| Index |
- Bootsector of Bootable CD Wizard (BCDWBOOT.BIN)
- Bootsector of Microsoft Windows XP/2000 (NT5BOOT.BIN or NT5BOOTM.BIN)
- Bootsector of Microsoft Windows NT (NT4BOOT.BIN or NT4BOOTM.BIN)
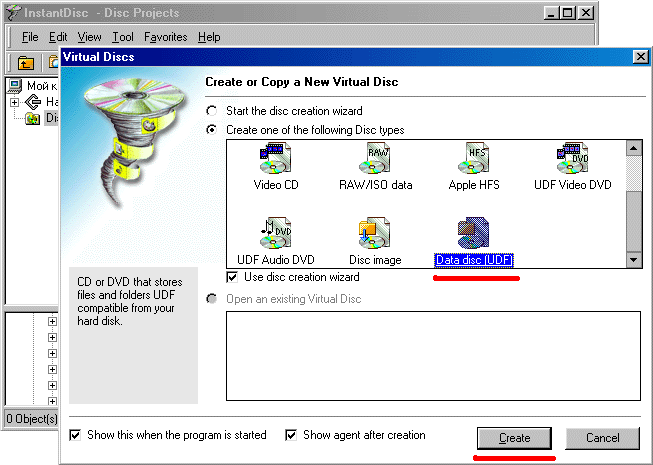
- Start Instant CD+DVD 6
- Choose project CD or DVD (for CD - "Data disk", for DVD - "Data disk (UDF)")
- Click button "Create" and choose the other parameters of
the CD or DVD project with the wizard.

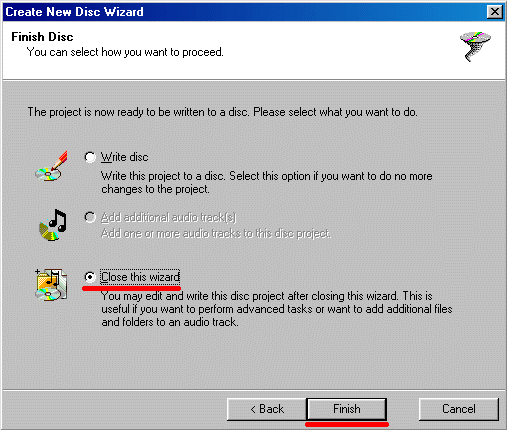
- Close the wizard.

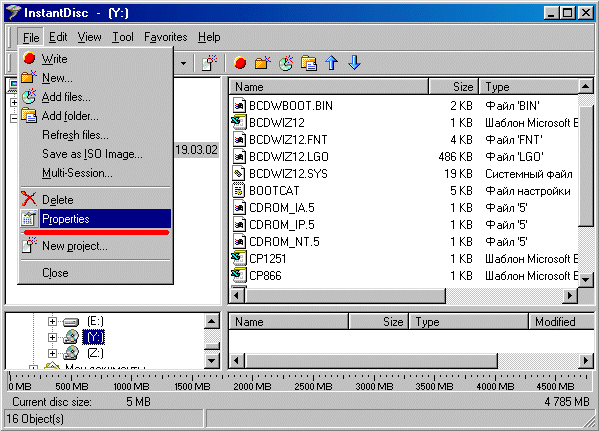
- From the menu "File" select "Properties"

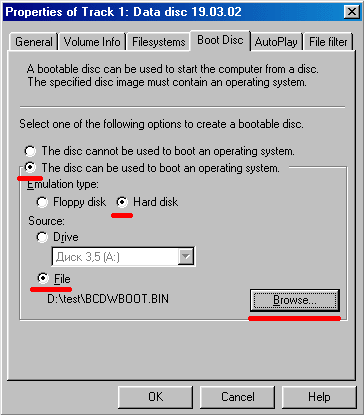
- On the card "Boot Disk" select "The disk can be used to
boot an operating system."
- In section "Emulation Type" select "Hard disk"
- In section "Source" sålect "File"
- Navigate to your bootsector file using the button "Browse"

- ATTENTION!
Because Instant CD+DVD 6 does not offer the "No emulation" option, you will have to create an image of this disk before recording it, and then use a Hex Editor (e.g. WinHex) and change:
55 AA 88 04 C0 07 00 00 01
to
55 AA 88 00 C0 07 00 00 04
English translation by Wolfgang Brinkmann